UPDATE: I’ve now made a custom PCB out of this.
This is my first experiment with Arduino. Like most people starting out with Arduino, I wanted to make stuff blink! So after finishing up the Arduino Starter Project Book I started hooking up LEDs to my Uno’s outputs. I very quickly ran out of outputs and a quick search through the Arduino Forum led me to the wonders of shift registers. These are basically serial to parallel ICs that allow you to just use three pins on the Arduino to control eight outputs. You can daisy chain them like I did and if you do, you can control many more outputs yet still using three pins to control them. I few days later, my SparkFun order had arrived and it was time to test my spanking new 74HC595N set.
Ingredients:
- 3 x 74HC595N shift registers.
- 8 x RGB LEDs, diffused.
- 8 x 200Ω resistors
- Lots of jumper cables
- 1 x Solderable PC Breadboard.
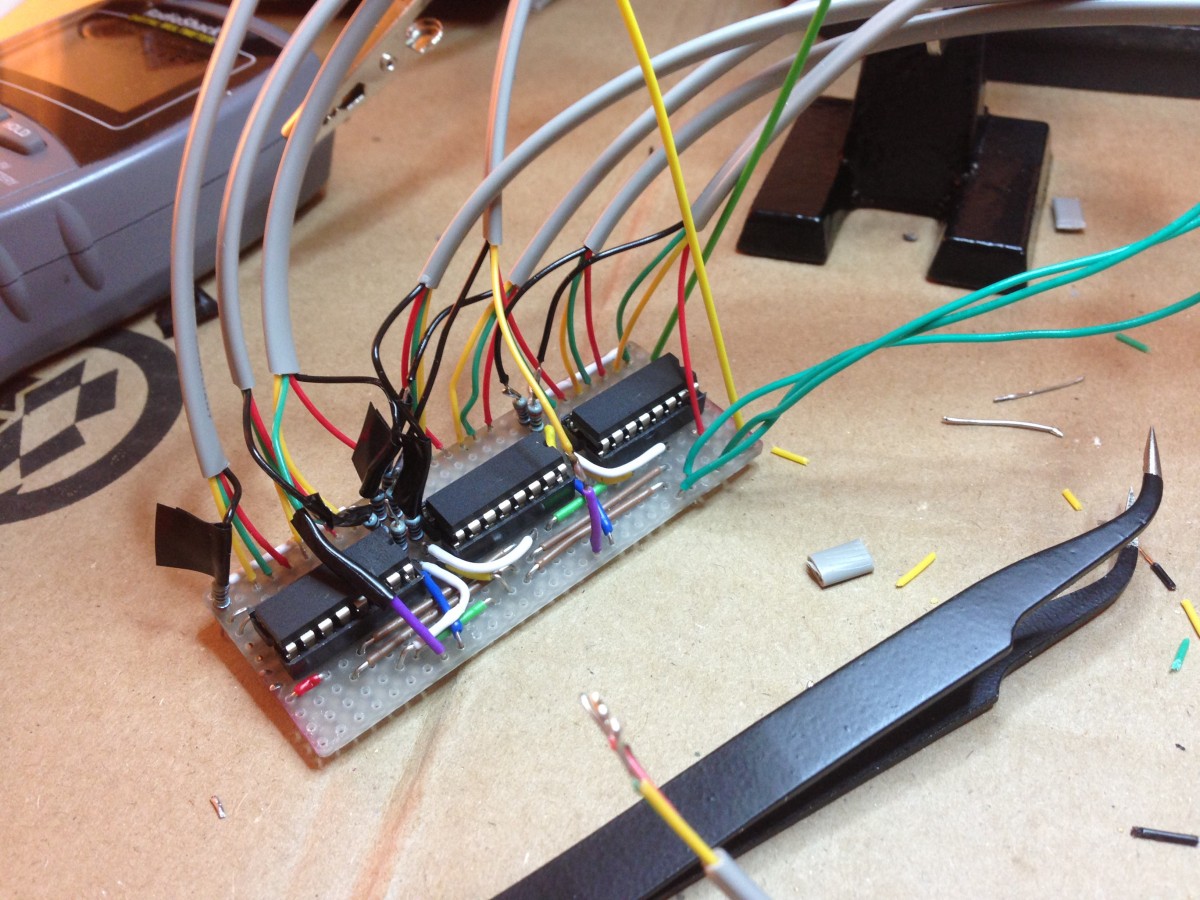
After some trial and error, I arrived at this. The gray cables are telephone cables that connect the controller to the LEDs.

Yikes, that looks ugly. I soon realized that I shouldn’t have soldered the LED cables to the board as it makes it very impractical to repair any LEDs or reuse parts. Even though it looks flimsy, so far it’s still in one piece.
I’ve put together a video that shows some of the build process and also the whole thing put together and working. At the end of the video you can see the presets that come with Elco Jacobs’ awesome ShiftPWM library which is what I used to control the LEDs.
Leave a Reply