deltaTime: Corona SDK plugin for time based animations

I’ve recently published a small but handy plugin in the Corona plugin directory. The deltaTime plugin allows developers to turn regular animations into time-based animations that will play back at the same speed regardless of framerate variations. This is important because you always want to have your objects move at the same speed regardless of what the framerate is. Even when you set your app’s framerate at a fixed number it never really runs at exactly that speed; sometimes it’s faster and sometimes it’s slower. Even worse, the framerate varies considerably in cellphones as other processes are most likely running in the background and using CPU cycles for something other than your app. Using this library helps in making all animations run at the same apparent speed even when your framerate varies. After this library is properly set up (don’t worry it’s incredibly easy) you should be able to change your framerate from 30 to 60 or vice versa and your animations should run at exactly the same speed.

Usually you would animate a Corona DisplayObject like this:

local speed = 5
obj.x = obj.x + speed

Or like this:

local speed = 5
obj:translate(speed, 0)

And that’s fine, except that every frame your object will move a fixed amount of points. If your framerate slows down then your object will move slower and if your framerate goes up then the object will move faster.

With the deltaTime plugin you can make this animation run at the same speed regardless of your framerate. But first you need to make sure your Corona project is ready for it. First you need to go to the Corona Plugin Directory and activate the plugin (click the green Free icon). It’s absolutely free and you need to do this only once per Corona account even if you use the plugin for many projects.

Second you need to add the plugin to the build.settings file so that the Corona server adds it to your build.

settings = {
    -- You may of course have other keys before, after 
    -- or even inside your "plugins" key.
    plugins = {
        ["plugin.deltatime"] = {
            publisherId = "com.julianvidal",
        },
    },      
}

And lastly you need to load the plugin just like any module and start it.

local deltatime = require "plugin.deltatime"
deltatime.start()

Now instead of making your objects move by a fixed amount you have to make sure that your movements take into account the time multiplier. This is very straight forward:

local speed = 5 * deltatime.multiplier()
object:translate(speed, 0)

That’s it! If your framerate drops, say by half, the multiplier will double so your speed variable will double too and your animations will continue to run at the same speed.


Corona SDK – The good, the bad, the great, and the downright awful

Lately I’ve been spending a lot of time developing mobile games with the Corona SDK. The idea behind it is that you code once and deploy to many targets like iOS, Android, Nook, etc. Also, Corona seems to be targeted at games and while they do have some samples of companies that did other kinds of apps, their core community seems to be mosly using the framework to develop mobile games.

Let me begin with the first thing you encounter while working with the Corona SDK; the Lua language.

The Lua language

It is clear why they chose Lua for their language and there are many articles on the web that state the benefits of it. It’s extremely easy to learn, easy to embed, and executes fast. On the other hand if you are used to doing object oriented design in C++, Objective-C, Java, or even “easier” languages like PHP or javascript, working with Lua will be analogous to being kicked in the balls repeatedly by a football player wearing cleats. Oh, and the cleats have rusty nails and broken pieces of glass glued all over. To me, programming in Lua feels like programming in LOGO (remember the turtle?). Everything is extremely basic and I find that everything I can do with other languages, I can’t with Lua. Sorting stuff in general is a pain (say, an array of objects). Well, when I say array I mean a table since Lua seems to only have tables. Every stone you pick up in Lua has a table under it and the only object you will ever work with is some sort of Frankenstein’d table. I’m not saying this is bad. I mean, you can’t compare a scripting language like Lua to a motherf***r of a language like C++. Apples and oranges. They were not created with the same goals in mind so it’s useless to compare them. To compare it with PHP would probably be a bit fair since they are both scripting languages which have at least one design goal in mind: to be powerful yet easy to learn. Still, apples and oranges.

So, on with the stuff that pissed me off about Lua…

Attempting to do object oriented design in Lua is like snowball fighting with a monkey, except instead of snowballs you use the monkey’s shit; you will eventually end up with the kind of mess that you will want to wash off as soon as possible. Is it possible? Yes, sort of, but not in the sense of “oh, I’ll just solve this by implementing the Disjointed Kangaroo Turd Fist” Let’s pretend the Disjointed Kangaroo Turd Fist is a well known Design Pattern by the Gang of Four. It’s not, but for the sake of argument let’s pretend it is. Well you won’t be able to implement it in Lua because there is no such thing as inheritance. You can do composition but that’s about it. Also, in Lua every method/property is public. I’ve spent a lot of time reading blog posts about how to do OOP in Lua and while there are some interesting reads out there, I found none of them to be practical for my applications. If the language mean to have people doing OOP there wouldn’t be so many blog posts -each with their own take- emphasizing that you can do OOP. You don’t see any blog posts trying to convince you that you can do OOP in Java because it becomes painfully obvious in the first 2 minutes of using the language. In a blog post that I will paraphrase and not link to (to protect the innocent) the guy said “why do you need to declare private methods? If you don’t want other objects to see them just don’t call them from other objects. Simple as that.” My point here is that the language is so simple that it’s being used by a lot of people who don’t know about good programming habits, have not worked in teams, and don’t know what maintaining code in the long run is. So even though the community itself if very prolific, they seem to be split in two categories. The first one being the “let’s code a game or two” guy, and the second one being the “I need to release this game FAST. What’s the easiest and fastest game dev framework around?” guy/company. Neither is too concerned with good programming habits, code readability, etc, so they just plod on and are not bothered much with the Lua kinks because they haven’t been exposed to other languages that were designed to be powerful and even better beautiful.

The framework itself

This is where the SDK shines. The API is incredibly simple yet powerful and it’s very well documented. The forums are crawling with people who take what they do seriously and are willing to help. Rarely do you see some troll or smart ass who tells other people to RTFM. The Corona staff post to the forums regularly and I think this is extremely important since it raises the quality of the answers considerably; on your average forum search, odds are that what you are looking for has been answered by one of the support staff. They also screen the posts for actual bugs and create tickets for them. This has happened to me personally and have seen it happen with other people too. They have a good policy of reporting and fixing their own bugs. If you are a subscriber you have access to the daily builds and in more than one case I’ve seen the bug fixed the following day. Getting your bug fixed the next days is one mother of a huge plus.

The framework also includes libraries like the Box2D (physics), Flurry (analytics) and many many others. Since they are wrapped in Lua, the implementation is not exactly the same as what you’d find in the libraries’ docs. Fortunately the Corona people have thoroughly documented these libs and you can find anything you need to make them work in the Corona docs too.

The code samples

The Corona docs have a lot of useful examples that are short and sweet. Each feature has and example with only what you need to make it work. They don’t include extra stuff. You want to draw a physics body? Here’s the code to do JUST that. Very cool. They even go a step further and often publish Tutorials that deal with more complete examples that go into much more detail on each subject.

The IDE

This part gets ugly again. I’ve got a copy of Lua Glider 2 which is basically a skinned up Netbeans but with 4 times the memory footprint and 10 times the bugs. Lua Glider 2 leaks memory like a mother. At the end of my work day, the stupid IDE will be eating up 4Gb of RAM. Mind you that I usually have no more than 4 files open at a time and the only “feature” that I use is the debugger. How on earth that can eat up 4GB of RAM is beyond me. So why not just restart it once in a while so that it frees up some RAM? Well… every time I close it I can’t open it up again because it freezes. This is the only app on my Mac that does this. I have to reboot in order to be able to open it up again.

I also tried Sublime editor which seems to be all the rage nowadays and the Corona SDK has an official plugin. It’s ok but I don’t seem to understand it quite well. It’s a text editor, really, not an IDE so a lot of features are great for a text editor but horrible for an IDE (autocomplete for starters). Sublime’s debugger also has one thing that annoys the crap out of me: you have to start it twice because it has an implicit breakpoint in line 1 that you can’t remove. But after using PhpStorm, any other IDE just doesn’t seem right. Of course you can install a plugin to get PhpStorm to do some Lua syntax highlighting but the debugger doesn’t work and that’s a deal breaker for me. I’ve tried a couple of the other suggested IDEs but they were soooooo bad that they weren’t even worth mentioning. I will stick to Sublime. A lot of people I respect swear by Sublime so I’m open to giving it another chance.

Game design tools

A good part of creating a game is spent outside your IDE in all sorts of small utilities that prepare your assets so that they can be consumed by your game. This is probably the major pain point I found so far. Most of the tools are designed by individuals or by very small companies. This is ok except that usually individuals can’t provide enough support (they have lives to live) and most of the small companies I’ve dealt with just didn’t care. Also, the Corona SDK moves pretty quickly. I mean, they update it constantly, which is good, but sometimes external providers/authors have to keep up with this, and I found that for a lot of game tools, this was not the case.

For example, let’s look at level editors…

If you are doing a game with levels or stages you will most likely be working with an external editor that has some sort of GUI to speed your workflow up. More often than not you will be working with Tiled Map Editor or Tiled for short. This great tool that allows you to import a tileset and draw your maps. It’s a project by an individual and has been alive for many years. I’ve requested features to the author and after they have been backed by other users, they have found a place in the software so it’s great to see that the author listens to users. But Corona itself can’t open Tiled maps alone; you need some kind of library. This is where it gets ugly.

Trying to find some kind of level editor for the Corona framework is easy. Trying to find one that a) works, b) is documented, c) actually speeds up your workflow, d) doesn’t make your balls hurt, e) works in OSX… well, this is next to impossible.

First there’s Level Director by Retrofit Productions. This only works for Windows so I didn’t even try it.

Then there’s Lime which allows you to open up your Tiled maps on your Corona app. This looked great except for the warning in the home page:

lime warning

This leads me to think that Lime is not maintained anymore otherwise the sign would read something completely different. So, we can scratch Lime off our list.

Then there’s SVG Level Editor. The idea behind it is beatiful: take SVG graphics and turn them into physics bodies. As I was trying to purchase a license from the project’s website I realized that the PayPal button was leading to a 404 error page. Hmm… so I Googled it and found that BinPress was selling it too so I got my license there. As I was trying it out I realized that I was getting more errors than results. Even the bundled examples din’t work. I contacted the author and after a couple of emails he told me that he couldn’t make the examples work either and this was due to a change in Corona’s API. He said he would try to update the library but after a week he said that he would need to make too many changes and that he didn’t have enough time to tackle this. BinPress kindly game me a full refund. This was very unfortunate as I have found no other library/tool that was as flexible as this one.

Wait, but didn’t the Lime warning point to another tile engine? Yes it did, and it’s called Million Tile Engine (or MTE). The only place where MTE was being sold was at Gumroad. This was a single page with only the bullet points of what it could do and nothing else. No links to API reference, documentation, examples, FAQ, or forums. Nothing. So I hesitated and kept looking but it was clear after a couple days of Googling that most people were using MTE and swearing by it so I decided to give it a go. When I went back to the Gumroad page to buy my license… it was not available anymore. Back to the Corona forums (and fast forward a week). It turns out the author of MTE decided that the project was taking up much of his time and leaving to little money (completely understandable) so he was discontinuing it. Now this stirred up the forums and many people started giving the author ideas on how to make money from -or open sources the engine- and people were also asking for the product to become available again even without support (myself included). After a couple of days, MTE became available again and I could get my hands on it.

MTE came in the form of a ZIP file with many code samples and code-complete projects. It came with a few pages of tutorials/FAQ and a basic API reference. It does what it is supposed to do and it does it well. I have -obviously- very little experience with it but most people regard it as a mature project even though the version number doesn’t reach 1. Still, would you start your next project with a tool that you know is dead? Yes, it might be working right now but what happens when Corona decides to change it’s API? What happens when you find a bug?

Another engine I tried is the Dusk Engine. This one was made by a 14 year old developer who will probably be working at Google in a few years. The code is impressive and it is very easy to use. You export your Tiled maps as either .json or .lua and you open them up in your app. While I couldn’t get the .lua maps to work, I did manage to get the .json ones working properly. The documentation is… getting there. I mean, there is an unfinished HTML version of almost half the API. After your retinas get adjusted to the white-and-yellow-text-over-black-background shock (which I immediately changed in the CSS) you can see that there is some effort put in the docs generation. Of all the engines, this one has a more “regular” API documentation look. There are some tests included in the documentation (which no other engine had) and a utility to manipulate tilesets (like performing extrusion on them). I couldn’t make the extrusion tool work for the life of me and my tiles still look jagged in the edges when scrolling. This is not an issue of Dusk, by the way, but rather an issue of using tiles themselves. Still, other people have been able to use this tool successfully so most likely I was not doing things right. The Dusk author posts in the Corona forums quite regularly and happily answers most of the questions he is asked.

Finally there is Corona’s very own Composer GUI which is a visual level editor of sorts. It’s still in early beta and when I tried it, it crashed a lot and when it didn’t I got the app in un unstable state many times. So it is unfair to compare it to other solutions out there. It reminded me a little bit of Flash. Why is it that every time that I think about Flash I get this mental image of dismembered bunnies covered in blood?

Final thoughts

So if you are still reading this completely biased and half-assed Corona review, here are my final thoughts on the matter.

Developing with Corona SDK

Pros:

  • Very easy to learn.
  • Going from idea to prototype is extremely fast.
  • Thorough documentation and online resources available.
  • Great and active community.
  • Access to daily builds if you pay a fee.
  • Non-developers can get up to speed really fast (this also leads to one of the cons listed below).

Cons:

  • Most of the tools you use to work with it are unreliable either because they are unmaintained, dead, or simply supported by their single author (you need to wait for the guy to come back from holidays or their day job to answer your questions). To me this weighs A TON and takes away they joy of the framework massively.
  • A lot of people who code Lua have never programmed a “more serious” programming language or have never worked as developers and the “solutions” they provide in blogs or forum posts while workable, are not necessarily maintainable or promote good coding practices. “But it works!” is sometimes not good enough if you want to do things right and produce beautiful code.
  • The Lua language while easy to work with, is extremely limited when it comes to traditional Object Oriented Programming and will require devs to re-think how to architect software. Your precious Design Patterns (or most of them) fly out the window and you have to re-invent the wheel a lot of the times. If you have previous software architecting knowledge be prepared to go back to the stone age.

Particle based animation with openFrameworks

Continuing on with my other particle based generative art, here’s an animation I made with openFrameworks.

A still:

sun

Particle based generative art with openFrameworks

I’ve recently started playing with openFrameworks and I have to say I’m very impressed. Having messed with Processing previously, openFrameworks doesn’t feel too alien. It does have a steeper learning curve than Processing but it you’ve programmed C++ before it shouldn’t be long until you can whip up your first masterpieces.

Last week I’ve created a very simple particle system and had each particle leave a trace as it was animated. The following images are variations on the same theme. They are pretty much the same program with a few changes made between each run.

The common thing in all of these is that the particle movement is governed by Perlin noise.

(click images for larger versions)

open_frameworks_01 open_frameworks_03 open_frameworks_04 open_frameworks_06 open_frameworks_07 open_frameworks_08 open_frameworks_10 open_frameworks_11 open_frameworks_12 open_frameworks_14 open_frameworks_16 open_frameworks_17

How to create custom TextWrangler filters with PHP

I’ve been using TextWrangler  for years because it’s fast, it has all I need and best of all it’s free. Even though I don’t use it as an IDE, many times I wish it had a few features such as auto-formatting JSON strings. Fortunately, it is very easy to write custom text filters and use them from within TextWrangler. I will show you how to write a “Pretty JSON” filter which takes any valid JSON string and formats it so that it is easier for humans to read while still remaining valid JSON. I will be using php to achieve this.

First we need to write the script. It needs to be able to run as a shell script so you will need to include a shebang pointing to your php executable. To find your php executable, open a Terminal window and type:

$which php

The which command tells you the full path to a program on your path. The output should look something similar to this:

/usr/bin/php

In this case, my php path is /usr/bin/php. We will be using that for our shebang.

Then you need to make a php program that can take input from stdin and output to stdout. Here’s the full php script we will be using:

#!/usr/bin/php 
<?php

$data = file_get_contents('php://stdin');

$json = json_decode($data);

if ($json == null) {
    // Problem decoding json
    return $data;
}

echo json_encode($json, JSON_PRETTY_PRINT);

Basically we capture whatever came from stdin into $data and then decode it into $json. Since the input could be invalid JSON we want to return it untouched in case of error. This is important because if our php program produces any errors, you will then see it in TextWrangler when you use your filter and lose the original data. If we return the original data in case of error, our filter will appear to do nothing which is much better than losing the original data.

Lastly, we return the newly encoded string except that we used JSON_PRETTY_PRINT so that php will add extra whitespace to our string.

Save this script somewhere and copy (or create a symlink like I did) to TextWrangler’s filters dir. This is located here:

~/Library/Application Support/TextWrangler/Text Filters

Note that the name of the file minus the extension will become the name of the text filter inside TextWrangler so you should give it something meaningful.

Now open up TextWrangler (I believe you need to restart it if you already had it open). Under the menu “Text”, the very first option should be a drop-down menu called “Apply Text Filters” and in there should be your filter. Let’s give it a try. Type this into a blank document:

{"testing":123,"hello":"world"}

After you run your new filter your text should look like this:

{
 "testing": 123,
 "hello": "world"
}

Note that the filter could be written in any language, and you can even use already available utilities like aws, sed, etc, to automate everyday tasks.

Logging to Amazon’s DynamoDB from Zend Framework 2

I recently had to write an app that would run in Amazon Beanstalk. The thing with Beanstalk is that you can set some server metric to trigger automatic scaling (up or down) for your EC2 instances so you cannot count on any particular instance to be there at any time. So, any logging you do to a local file will be lost when the instance is destroyed. This is why I had to write something that could log to DynamoDB so that my logs would be untouched if the instances ceased to exist.

I found that doing this in ZF2 was incredibly easy. This pretty much took me 10 minutes and the best thing was that it required almost no code change at all other than instanciating my new writer and passing it to my file logger before using it.

Here’s the code:

<?php
namespace JulianVidal\Amazon\DynamoDb;

use Zend\Log\Writer\AbstractWriter;
use Aws\DynamoDb\DynamoDbClient;

class LogWriter extends AbstractWriter
{

    /**
     * Amazon DynamoDB Client
     *
     * @var DynamoDbClient
     */
    protected $client = null;

    /**
     * Table name
     * 
     * @var string
     */
    protected $table;

    /**
     * A string identifying this system useful when logging from multiple
     * systems into the same DynamoDB.
     * 
     * @var string
     */
    protected $origin;

    /**
     * Constructor
     *
     * @param DynamoDbClient $client DynamoDb client
     * @param string $table The DynamoDb table to log to
     * @param string $origin A string identifying this system
     * @throws Exception\RuntimeException
     */
    public function __construct(DynamoDbClient $client, $table, $origin = null)
    {
        $this->client = $client;
        $this->table  = $table;
        $this->origin = $origin;
    }

    /**
     * Write a message to the log.
     *
     * @param array $event event data
     * @return void
     * @throws Exception\MissingClientException
     */
    protected function doWrite(array $event)
    {
        if ($this->table == '') {
            throw new Exception\TableNotSetException('Logger needs a table to log to');
        }

        $message = array(
            'TableName' => $this->table,
            'Item' => $this->client->formatAttributes(array(
                'id'           => sprintf('%s_%s', time(), rand(10000, 99999)),
                'timestamp'    => $event['timestamp']->format('Y-m-d H:i:s'),
                'priority'     => $event['priority'],
                'priorityName' => $event['priorityName'],
                'message'      => $event['message'],
                'origin'       => $this->origin,
             )),
        );

        $this->client->putItem($message);
    }

    /**
     * Close the stream resource.
     *
     * @return void
     */
    public function shutdown()
    {
        $this->client = null;
    }

    /**
     * Get table
     * 
     * @return string
     */
    public function getTable()
    {
        return $this->table;
    }

    /**
     * Set the DynamoDb table to log to
     *
     * @param string $table
     */
    public function setTable($table)
    {
        $this->table = $table;
    }

    /**
     * Get Client
     *
     * @return DynamoDbClient
     */
    public function getClient()
    {
        return $this->client;
    }

    /**
     * Set Client
     *
     * @param \Aws\DynamoDb\DynamoDbClient $client
     */
    public function setClient(DynamoDbClient $client)
    {
        $this->client = $client;
    }

    /**
     * Get origin
     *
     * @return string
     */
    public function getOrigin()
    {
        return $this->origin;
    }

    /**
     * Set origin
     *
     * @param string $origin
     */
    public function setOrigin($origin)
    {
        $this->origin = $origin;
    }

}

You might be wondering what the $origin bit is all about. This is not necessary in order to log to DynamoDb but in my case I had to identify each instance somehow so I ended up passing an $origin string which would contain some of that particular EC2 instance’s identification (I think it was the instance ID plus the public DNS or something).


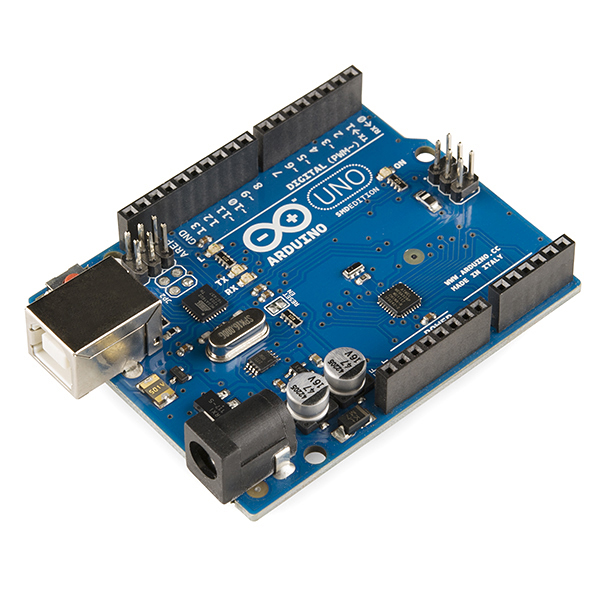
Calibrator: An Arduino library to calibrate sensors hooked to analog inputs

Once you get past your first few projects with the Arduino, you soon realize that the calibration method they show on their webpage is just a sample and cannot be used with many sensors without polluting your code with a ton of variables.

So, here it is. My own take on sensor calibration library. You can download the source code and a more detailed explanation on the github Calibrator page.

This is how you use it:

#include <Calibrator.h>

Calibrator calibrator;

int sensorPin = A0; // The sensor we want to calibrate
int ledPin = 13;    // Will indicate when calibration is going on

void setup()
{
    pinMode(ledPin, OUTPUT);
    digitalWrite(ledPin, HIGH); // Turn LED on
    Serial.begin(9600);

    // Reset the calibrator. You only need to call reset() if you restart calibration again but
    // if calibration is only run once like in this example is not needed. It doesn't hurt to 
    // call it here though. 
    calibrator.reset();

    // Run calibration automatically during the first 
    // five seconds (or 5000 milliseconds) your code runs.
    // It is important that during calibration you "exercise" your sensors to measure both 
    // ends of their range.
    while (millis() < 5000) {
        calibrator.setValue(analogRead(sensorPin));
    }
    digitalWrite(ledPin, LOW); // Turn LED off
}

void loop()
{
    // In your code analogRead(sensorPin) will give you the uncalibrated value
    // and calibrator.getValue(analogRead(sensorPin)) will give you the calibrated value 

    Serial.print("Sensor value: ");
    Serial.print(analogRead(sensorPin));
    Serial.print(" , Calibrator value: ");
    Serial.println(calibrator.getValue(analogRead(sensorPin)));
}


Hacking O’Reilly’s “Fluent Conference 2013 ” video download page

The Fluent Conference 2013 videos were out and O’Reilly was offering a nice 50% discount to early purchasers. I went to their website and made the purchase. When I looked at the download page I realized that no videos were linked to my Dropbox account (like O’Reilly does when you purchase a book from them). I wanted to have a local copy of all videos to be able to watch them offline but O’Reilly only provides single download link per-video. There isn’t a “Download All” link and there isn’t any download manager available. My first reaction was to say -screw this- I’ll download them one by one. As I downloaded the first one I realized that not only the download speed was sub-par (1.5 megabytes per second) but I was being disconnected very often and the download had to start all over again (it wasn’t resuming). Not good.

Disclaimer: This post doesn’t describe any illegal activities but rather uses the term hacker in the way described in this Wikipedia article.

Plan B. Let the hacking begin.

I viewed the page source and realized that they were using jQuery. I also saw that the download URLs for all the videos were right there; there was no redirections or obfuscation of any kind. So after a couple tries using Firebug’s console, I came up with this jQuery:

$(".format").find("a:nth-child(2)").each(function( index ) {
    console.log(this.href); 
});

This basically says “find all nodes with the format class and drill down to the second link. Give me the href for all these and print them out to the console”.

Great, now I had a list of the URLs for all the videos. I saved them to a plain text file. I now needed a method to download them all without me having to click, click, click…

wget

wget is very flexible when it comes to downloading stuff (which is a good thing since it was written to do that!). So this is what I tried:

wget -i list.txt

The -i makes wget download files from list.txt. This worked great except that sometimes the download would stall exactly like it did when I was using the browser. Now, wget was designed to work well with crappy connections so it would retry a few times and start downloading again. But… sometimes it would just give up and would leave a half downloaded file. Restarting it again would cause the file to be overwritten so I added the -c (continue) param to prevent this and wget would pickup were it left off.

So far it was a great improvement: now the downloads would retry if failed and resume from where they left off. I only needed to solve the problem where wget would just give up sometimes. This happened very rarely so it wasn’t a big deal but still…

Bash

So I wrote this simple bash script that would just restart wget again if it stopped.

#!/bin/bash
for i in {1..50}
do
    wget -c -i list.txt
done

So even after the downloads had finished if the wget cycle was restarted, no significant bandwidth would wasted as wget was smart enough to not download stuff that it had already downloaded.

After the downloads finished I saw that the file names were horrible: ea4b8c913c44e_5813709.mp4?title=42_secrets-of-awesome-javascript-api-design-brandon-satrom.mp4. Yikes.

Enter PHP

I wrote this little script that does some quick and dirty string manipulation and renames all the videos it finds in a directory.

$handle = opendir('.');

if (!$handle) {
    echo "Can't open dir\n";
    die();
}

while (false !== ($entry = readdir($handle))) {

    $pathinfo = pathinfo($entry);
    if (!isset($pathinfo['extension']) || $pathinfo['extension'] != 'mp4') {
        continue;
    }

    $tokens = explode('=', $pathinfo['filename']);
    $filename = $tokens[1];
    $filename = str_replace('-', ' ', $filename);
    $filename = str_replace('_', ' - ', $filename);
    $filename = ucwords($filename);
    echo $filename . "\n";

    rename($pathinfo['basename'], $filename . '.' . $pathinfo['extension']);
}

closedir($handle);

The script turned this:

ea4b8c913c44e_5813709.mp4?title=42_secrets-of-awesome-javascript-api-design-brandon-satrom.mp4

… into this:

42 – Secrets Of Awesome Javascript Api Design Brandon Satrom.mp4

Much better!

Learn how to read and write binary numbers in 5 minutes.

Over the years I’ve been asked to explain this to many people and most of the times as I was done explaining this, people would say “Huh, I thought it was harder!”. I think the reason is that when people are taught how to do this they are shown the math behind it and they immediately get bored and switch to “don’t know, don’t care” mode.  I’m not going to go over the math behind binary numbers because you can look that up anywhere but I’m going to show you a quick and dirty way that works every time.

The fact is, you can learn how to read and write binary numbers just by doing simple additions.

First of all, let’s build our mental cheat sheet. You will be writing a sequence of numbers starting from 1. The next number in the sequence will be the previous one times two. You will put each successive number to the left of the previous one. If you didn’t understand the previous two sentences don’t bother reading them back, just look at the picture and see if you can deduce the sequence because this is as hard as it gets. The rest is downhill:

binary_cheat_sheet

As you can see, if you take any number in the sequence and double it you get the number to the left. If you half your number, you get the number to your right.
Now write your binary number on top of your cheat sheet. Let’s take the number 10111 and write it on your cheat sheet. It’s OK if you have extra numbers on your cheat sheet, you can just leave them blank as we are not going to use them.

binary_10111

Now you add whatever numbers you have under every 1 and discard the numbers under every 0. Like this:

binary_23

It’s that simple.

Here are some other few examples if you want to try this out for yourself.

  1. 11
  2. 1001
  3. 10010
  4. 10000011

(Click the spoiler alert to show the answers)

Answers:
1) 3
2) 9
3) 18
4) 131